This article explains how to set up a previously used TimeMoto device for use with your TimeMoto Cloud account. Before connecting a second-hand or reused device, it is important to remove any existing data to prevent old attendance records, employee data, or other information from synchronizing to your account. This guide helps you verify that the device is ready for setup, clear old data, and complete the connection process.
Note: Before you connect a second-hand device to your Cloud account, please ensure you delete all old data from the storage to avoid unwanted data being synchronised with your new Cloud account. You can find more information below.
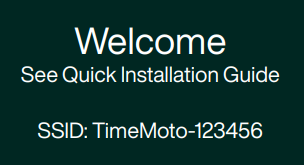
1. Check if you can see the Welcome Screen
If you cannot see the Welcome Screen as shown below, the previous user hasn't reset the device properly. In that case, please get in touch with us via the Contact Form.
2. Set up your device
As long as you can see the Welcome Screen, you can set up the device as explained in our Setup Guide.
How can I delete all old data?
In order to delete data from your device, you need to have access to the device menu. If you cannot access the menu, please get in touch with us via the Contact Form.
- As a Manager, press the Menu key on your device and identify yourself.
- Use the arrow buttons to select
[Data Management]and press the OK key. - Select
[Delete Data]and press the OK key again. - Go to
[Delete All Data]and press the OK key. - A notification will appear. Use the arrow keys to select the option
[OK]on the display (it will light up green). Confirm with the OK key one more time.
Keep your device updated
To guarantee you benefit from the latest features, we recommend you check whether your device is running with the latest firmware. Depending on your device you can do this by following the instructions below:
Can't connect to your account?
Did you follow all the steps above? If your device still cannot connect to your account, check for possible solutions in this article.
Any questions?
Take a look at our Glossary or reach out to us via the Contact Form.
Comments
0 comments
Article is closed for comments.